
Why These 10 Tips for Biking Across the Golden Gate Bridge Will Transform Your Ride
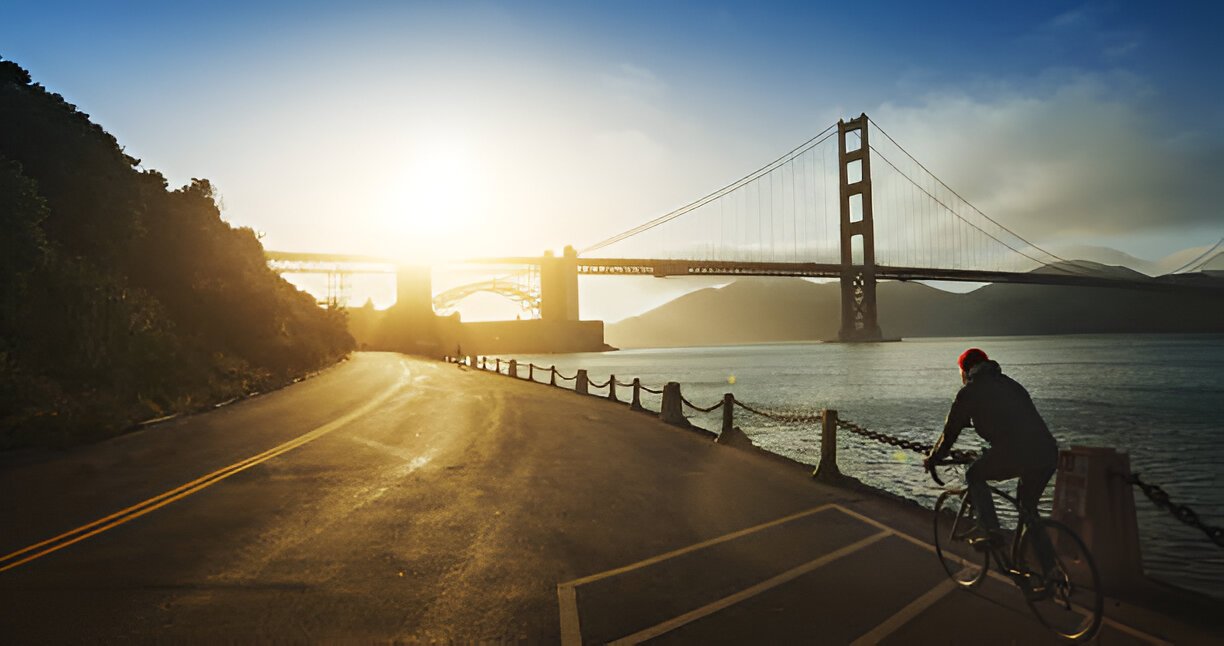
The first time I pedaled onto the Golden Gate Bridge, I thought I was prepared. I’d read the guides, checked the weather, and rented what I thought was decent gear. Then the wind hit me like a freight train at the north tower, nearly sending me into the railing as a pack of serious cyclists whooshed past at 25 mph. That humbling moment taught me that biking across San Francisco’s most iconic landmark isn’t just about showing up with a rental bike – it’s about understanding the bridge’s moods, mastering its challenges, and knowing secrets that only come from years of crossing it weekly.
After five years of living in San Francisco and biking across the Golden Gate Bridge over 200 times – in fog so thick I couldn’t see the cables above, during sunset rides that made me pull over just to cry at the beauty, and even during those rare perfect days when the bridge feels like cycling through a postcard – I’ve learned that most guides barely scratch the surface of what you need to know.
These aren’t your typical “wear a helmet” tips. This is the real insider knowledge that separates tourists struggling against the wind from cyclists who glide across like they own the place. These 10 tips for biking across the Golden Gate Bridge come from real experience, countless mistakes, and hard-earned victories against one of the world’s most challenging and rewarding cycling adventures.
Tip #1: Master the Bridge’s Hidden Weather Patterns (Not Just “Check the Forecast”)
Forget generic weather apps – the Golden Gate Bridge creates its own microclimate that changes every few hundred yards. Here’s what five years of daily crossings taught me:
The Morning Magic Window (7:00-9:30 AM): This is when the bridge is most predictable. Marine layer fog typically sits below bridge level, creating dramatic photo opportunities without wind chaos. I’ve crossed in complete calm at 8 AM, only to return at noon fighting 35 mph gusts.
The Dangerous Midday Switch (11 AM-2 PM): As inland temperatures rise, the pressure differential intensifies. The bridge becomes a wind tunnel, especially near the towers. I learned this the hard way when a sudden gust at the south tower sent me sideways into a tourist taking selfies.
The Golden Hour Gamble (5:00-7:00 PM): Stunning light, but wind patterns are completely unpredictable. Sometimes it’s glass-calm perfection; other times, you’re white-knuckling the handlebars.
Pro Weather Hack: Check the Marin County weather alongside SF. If there’s more than a 10-degree temperature difference, expect serious wind. I use the NOAA marine forecast for the Golden Gate specifically – search “Point Bonita weather” for the most accurate wind predictions.
Fog Strategy: When fog rolls in, it usually hits the north side first. If you’re cycling from SF, you’ll ride from clear conditions into a wall of fog at mid-span. Carry a light and slow down dramatically – visibility can drop to 20 feet instantly.
Tip #2: Choose Your Bike Rental Like Your Life Depends on It (Because It Might)
Most tourists grab any bike and wonder why they’re miserable. After testing dozens of rental options, here’s the truth:
Best Overall: Sports Basement Presidio ($45/day)
- Why it’s superior: Actually maintained by cyclists, not tourist-trap employees
- Secret advantage: Their mechanics are Bay Area cycling enthusiasts who’ll give you real advice
- Insider tip: Ask for their “Golden Gate special” – they’ll adjust tire pressure for bridge winds and check brake performance
Tourist Favorite (But Overrated): Blazing Saddles ($40-50/day)
- Reality check: Bikes are basic, often poorly maintained
- Hidden cost: They push expensive add-ons you don’t need
- Only advantage: Multiple locations for easy returns
Local Secret: Wheel Fun Rentals at Pier 39 ($35/day)
- Why locals use them: Better bike quality than most tourist shops
- Insider knowledge: They know which specific bikes handle bridge winds best
- Pro tip: Ask for bike #27 (red Trek) or #33 (blue Specialized) – these are their best-maintained units
Electric Bike Reality: E-bikes seem appealing for bridge hills, but they’re terrible in bridge winds. The extra weight makes them harder to control in gusts, and batteries often die mid-ride in cold, foggy conditions.
What to Inspect Before Riding:
- Brake responsiveness (crucial for bridge emergency stops)
- Tire pressure (underinflated tires are dangerous in crosswinds)
- Gear shifting smoothness (you’ll need to shift constantly on the bridge)
- Helmet fit (rental helmets are often one-size-fits-none disasters)
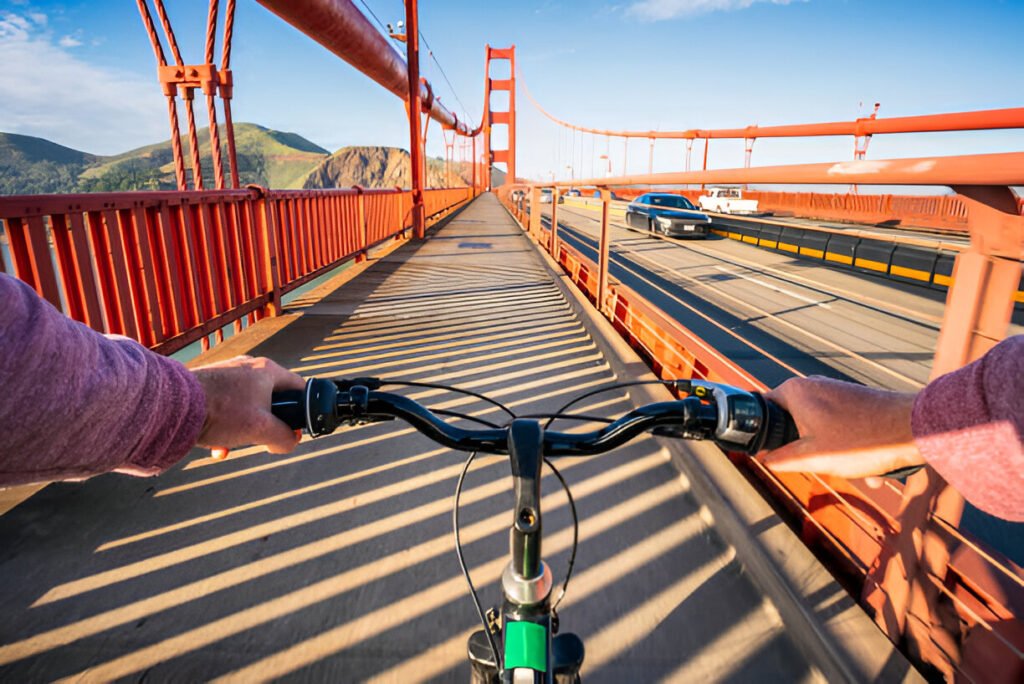
Tip #3: Navigate Like a Local, Not a Tourist GPS
The difference between struggling tourists and smooth local riders isn’t just experience – it’s route knowledge. Here are the paths that actually work:
The Efficient Local Route (6.8 miles): Start at Sports Basement Presidio → Crissy Field East → Battery East Trail → Golden Gate Bridge → Hawk Hill Lookout → Alexander Avenue → Sausalito Ferry
Why this works: Avoids tourist bottlenecks at Fisherman’s Wharf and gives you the best bridge approach angle.
Secret Shortcut Most Guides Miss: Instead of the crowded main path to the bridge, take the Battery East Trail from Crissy Field. It’s a hidden gem that delivers you directly to the bridge entrance with zero tourist chaos and incredible approach views.
Bridge Navigation Secrets:
- East Sidewalk (weekdays/Friday mornings): Stay far right, expect pedestrian chaos
- West Sidewalk (Friday afternoons/weekends): Cyclist-only paradise, but entrance is confusing
- Mid-span strategy: The center section has the strongest winds – shift to easiest gear before you hit it
Getting to the West Sidewalk (The Tricky Part): From the Welcome Center, follow the path that curves RIGHT and UP, then goes UNDER the bridge roadway. Most people miss this and end up on the wrong side. Look for the small “Cyclists” sign – it’s easy to miss.
Sausalito Descent Secret: Don’t follow Google Maps for the ride down to Sausalito. Take Bunker Road instead of the main Alexander Avenue route. It’s longer but infinitely safer, with better views and almost no car traffic.
Tip #4: Time Your Crossing Like a Strategic Operation
Timing isn’t just about avoiding crowds – it’s about understanding the bridge’s personality throughout the day:
Peak Performance Windows:
- Tuesday-Thursday, 8:00-9:30 AM: Absolute optimal conditions
- Sunday, 7:00-8:30 AM: Weekend sweet spot before the chaos
- Winter weekdays, 10:00-11:00 AM: Surprisingly perfect when tourists stay away
Times to Absolutely Avoid:
- Saturday/Sunday, 11 AM-4 PM: Tourist nightmare, dangerous overcrowding
- Any summer afternoon after noon: Wind becomes genuinely dangerous
- Weekday commute hours (7:30-9:00 AM, 5:00-6:30 PM): Serious cyclists moving fast
Seasonal Insider Knowledge:
- June-August: Morning fog is predictable, afternoon wind is brutal
- September-October: Best overall weather, but busiest tourist season
- November-February: Dramatic weather, fewer crowds, incredible storm photography
- March-May: Unpredictable everything, but amazing wildflower views in Marin
Special Event Awareness: Major events like Fleet Week, Bay to Breakers, or Giants playoff games create massive traffic disruptions. Check SF event calendars before planning your ride.
Tip #5: Master Bridge Cycling Etiquette (Or Risk Becoming “That Tourist”)
The Golden Gate Bridge has an unspoken culture that separates locals from tourists. Understanding it transforms your experience:
The Golden Rules:
- Right side, single file, always – even when the path seems empty
- Signal before stopping – hand behind back, palm flat
- Never stop on the bridge roadway – pull completely into designated areas
- Pass on the left, announce loudly – “On your left!” works universally
Advanced Etiquette:
- Speed matching: Don’t be the slow rider holding up traffic, but don’t try to keep up with racing cyclists
- Photography courtesy: If you must stop for photos, move completely out of traffic flow
- Group riding: Maximum two abreast, single file when others approach
Local Cyclist Signals to Learn:
- Point to road hazards – locals will point at potholes, debris, or pedestrians
- Wave thanks – acknowledgment when someone lets you pass
- Slow bell ring – friendly “excuse me,” not aggressive
What Marks You as a Tourist (And Annoys Locals):
- Stopping suddenly without signaling
- Riding four people wide across the path
- Wobbling unpredictably while taking selfies
- Ignoring right-of-way rules
Emergency Etiquette: If you break down or crash, move completely off the path immediately. Other cyclists will stop to help – this is part of bridge culture. Carry the emergency phone number: (415) 921-5858.
Tip #6: Decode the Bridge’s Secret Photography Spots
Forget the obvious shots everyone gets. Five years of crossing taught me where the real magic happens:
The Unknown Gems:
- Battery Spencer Approach: Before you reach the bridge, take the uphill detour to Battery Spencer. The approach angle makes the bridge look massive and dramatic
- South Tower Interior: At the base of the south tower, there’s a small viewing area most people miss. The perspective looking UP at the cables is incredible
- Mid-Span Looking East: Everyone photographs west toward Marin. Turn around mid-bridge for stunning San Francisco skyline shots
Technical Photography Secrets:
- Golden Hour Positioning: For sunset shots, be on the Marin side looking back at SF. The bridge silhouettes perfectly against the city lights
- Fog Photography: When fog rolls under the bridge, stop at the first tower. You’ll capture the bridge emerging from clouds
- Wind Day Advantages: High winds create dramatic wave action below – use fast shutter speeds to freeze the spray
Equipment That Actually Works:
- Phone photography: Modern phones handle bridge lighting well, but secure them with a wrist strap
- Action cameras: GoPros mounted on helmets capture the riding experience without handlebar vibration
- Professional gear: If bringing a DSLR, use a stabilizing strap and accept that wind will challenge every shot
Instagram vs. Reality: The famous “center of the bridge with arms spread” shot requires stopping in traffic flow and is actually dangerous. The better version: same pose at the designated viewing areas at each tower.
Weather-Specific Shots:
- Clear days: Focus on architectural details and cable patterns
- Foggy conditions: Capture mystery and drama with silhouettes
- Stormy weather: Dramatic sky contrasts, but secure all equipment
Tip #7: Prepare for Physical Challenges No One Warns You About
The bridge isn’t just about distance – it’s about unique physical demands that catch people off-guard:
The Wind Reality: Bridge winds aren’t like normal headwinds. They’re unpredictable, gusty, and can literally blow you sideways. I’ve seen tourists panic when a sudden gust hits at the tower sections.
Physical Preparation:
- Core strength matters more than leg strength – you’ll fight crosswinds constantly
- Grip endurance – death-gripping handlebars in wind leads to arm fatigue
- Balance confidence – if you’re not comfortable riding one-handed (for signaling), practice first
The Altitude Factor: At 246 feet above sea level, some people experience mild altitude effects, especially combined with wind and exertion. Stay hydrated and don’t ignore dizziness.
Temperature Shock: The bridge is always 10-15 degrees colder than the city, plus wind chill. I’ve started rides in shorts and t-shirts, then been shivering violently mid-bridge.
Muscle Groups You’ll Actually Use:
- Neck and shoulders – constant wind fighting
- Forearms – gripping handlebars tightly
- Lower back – fighting crosswinds requires core stability
- Hip flexors – more than you expect from the riding position
Recovery Strategy: Plan for post-ride fatigue. The combination of wind resistance, constant alertness, and adrenaline is more exhausting than the distance suggests.
Tip #8: Budget Like a Smart Local, Not a Tourist ATM
The real costs of bridge biking extend beyond basic bike rental:
Realistic Total Budget:
- Budget Option: $65-85 per person (includes bike, ferry, snacks)
- Comfort Level: $95-120 per person (includes better bike, meal, ferry)
- Premium Experience: $150-200 per person (includes e-bike, guided elements, full dining)
Hidden Costs Most Guides Don’t Mention:
- Bridge parking: $8-15 if driving to start point
- Ferry return: $14.25 per person (most popular option)
- Food/drinks: $25-40 per person for Sausalito dining
- Emergency taxi: $40-60 if you can’t complete the ride
Money-Saving Insider Tricks:
- Clipper Card: Reduces ferry cost to $7.75 (download app, add to phone)
- Weekday rental discounts: Many shops offer 20-30% off Tuesday-Thursday
- Multi-day rentals: Even if you only need the bike for one day, two-day rates are often barely more expensive
- Local vs. tourist shop pricing: Sports Basement charges locals $35/day vs. tourists $45/day (show local ID)
Free Alternatives Worth Considering:
- Bay Wheels bike share: $15/day, but limited range and no Sausalito stations
- Bring your own: Free bridge crossing, but logistics can be challenging
Worth the Splurge:
- Quality bike rental: The $10-15 difference between cheap and good bikes is transformative
- Electric bike for hills: Worth it if you’re continuing to Tiburon or doing extended Marin exploration
- Ferry return: Cycling back against afternoon winds is miserable
Tip #9: Handle Emergencies Like You Live Here
In five years of regular crossings, I’ve experienced or witnessed every possible bridge emergency. Here’s what you need to know:
Most Common Problems:
- Mechanical breakdown: Flat tires, chain issues, brake failure
- Weather emergencies: Sudden fog, dangerous wind gusts
- Medical issues: Panic attacks, exhaustion, minor crashes
- Getting lost: Wrong side of bridge, missed turns in Marin
Essential Emergency Kit:
- Phone with offline maps: Cell service can be spotty mid-bridge
- Emergency contact numbers: Bridge patrol, bike shop, taxi companies
- Basic tools: Most rentals include tire pump and basic tools – know how to use them
- Emergency cash: $40-60 for unexpected taxi rides
When to Abort the Mission:
- Wind speeds over 25 mph: Check real-time conditions at windfinder.com
- Dense fog with visibility under 50 feet: Genuinely dangerous
- Mechanical problems on the bridge: Don’t try to fix bikes in traffic
Emergency Procedures:
- Breakdown: Move immediately to designated safe areas at towers
- Medical emergency: Call 911, flag down bridge patrol, or use emergency phones
- Getting lost in Marin: Head downhill toward water – you’ll eventually reach Alexander Avenue
Local Help Resources:
- Bridge patrol: Regularly patrol and are genuinely helpful
- Other cyclists: Bridge cycling community looks out for each other
- Bike shops in Sausalito: Can handle most mechanical issues
Insurance Reality: Most bike rentals include basic liability, but not medical coverage. Travel insurance or health insurance that covers cycling accidents is recommended.
Tip #10: Unlock the Post-Bridge Experience Like a Local
Most tourists think the ride ends when they reach Marin. That’s when the real adventure begins:
The Local’s Marin Exploration: Instead of immediately heading to Sausalito, take the Hawk Hill Challenge. It’s a brutal 15-minute climb, but the 360-degree views of San Francisco, the bridge, and the Pacific are incomparable. I’ve brought friends from around the world here, and it’s the moment they understand why I live in San Francisco.
Sausalito Insider Dining: Skip the touristy waterfront restaurants. Poggio Trattoria has the best food with better prices, or grab coffee and pastries at Sausalito Bakery – where locals actually go.
Hidden Marin Gems:
- Rodeo Beach: 20-minute ride from bridge, dramatic black sand, often completely empty
- Point Bonita Lighthouse: Incredible lighthouse hike, but secure your bike well
- Tennessee Valley: Easy flat ride to hidden beach, perfect for picnics
Ferry Strategy: The Sausalito ferry is scenic but crowded. For a local experience, bike an extra 8 miles to Tiburon – smaller ferry, better views, and you’ll see parts of Marin that 99% of tourists miss.
Extending the Adventure: If you’re energetic, continue to Muir Woods (additional 45 minutes each way) or even Point Reyes (full day adventure). The bridge ride becomes just the warm-up for epic Bay Area cycling.
Return Options Ranked:
- Ferry from Tiburon: Most scenic, least crowded
- Ferry from Sausalito: Classic choice, can be very crowded
- Cycling back: Only recommended for experienced cyclists on calm days
- Taxi/Uber: Expensive but available if things go wrong
Local Secret: Many cyclists park at Crissy Field instead of tourist areas, then bike to the bridge and beyond. Parking is free, less crowded, and you skip the most touristy parts of the route.
Ready to Ride Like You Own the Bridge?
The Golden Gate Bridge isn’t just a tourist attraction – it’s a living, breathing challenge that rewards preparation with unforgettable experiences. After 200+ crossings, I still get excited every time I pedal onto that iconic span.
These tips come from real experience: getting caught in fog so thick I couldn’t see my front wheel, fighting winds that made me question my life choices, and discovering hidden viewpoints that make all the challenges worthwhile. The bridge will test you, teach you, and ultimately reward you with one of the world’s most incredible cycling experiences.
The difference between a good bridge ride and a transformative one isn’t luck – it’s preparation. Pack smart, ride confident, and prepare for the kind of adventure that makes you understand why San Francisco gets under people’s skin.
Your bridge is waiting. Time to make it yours.
